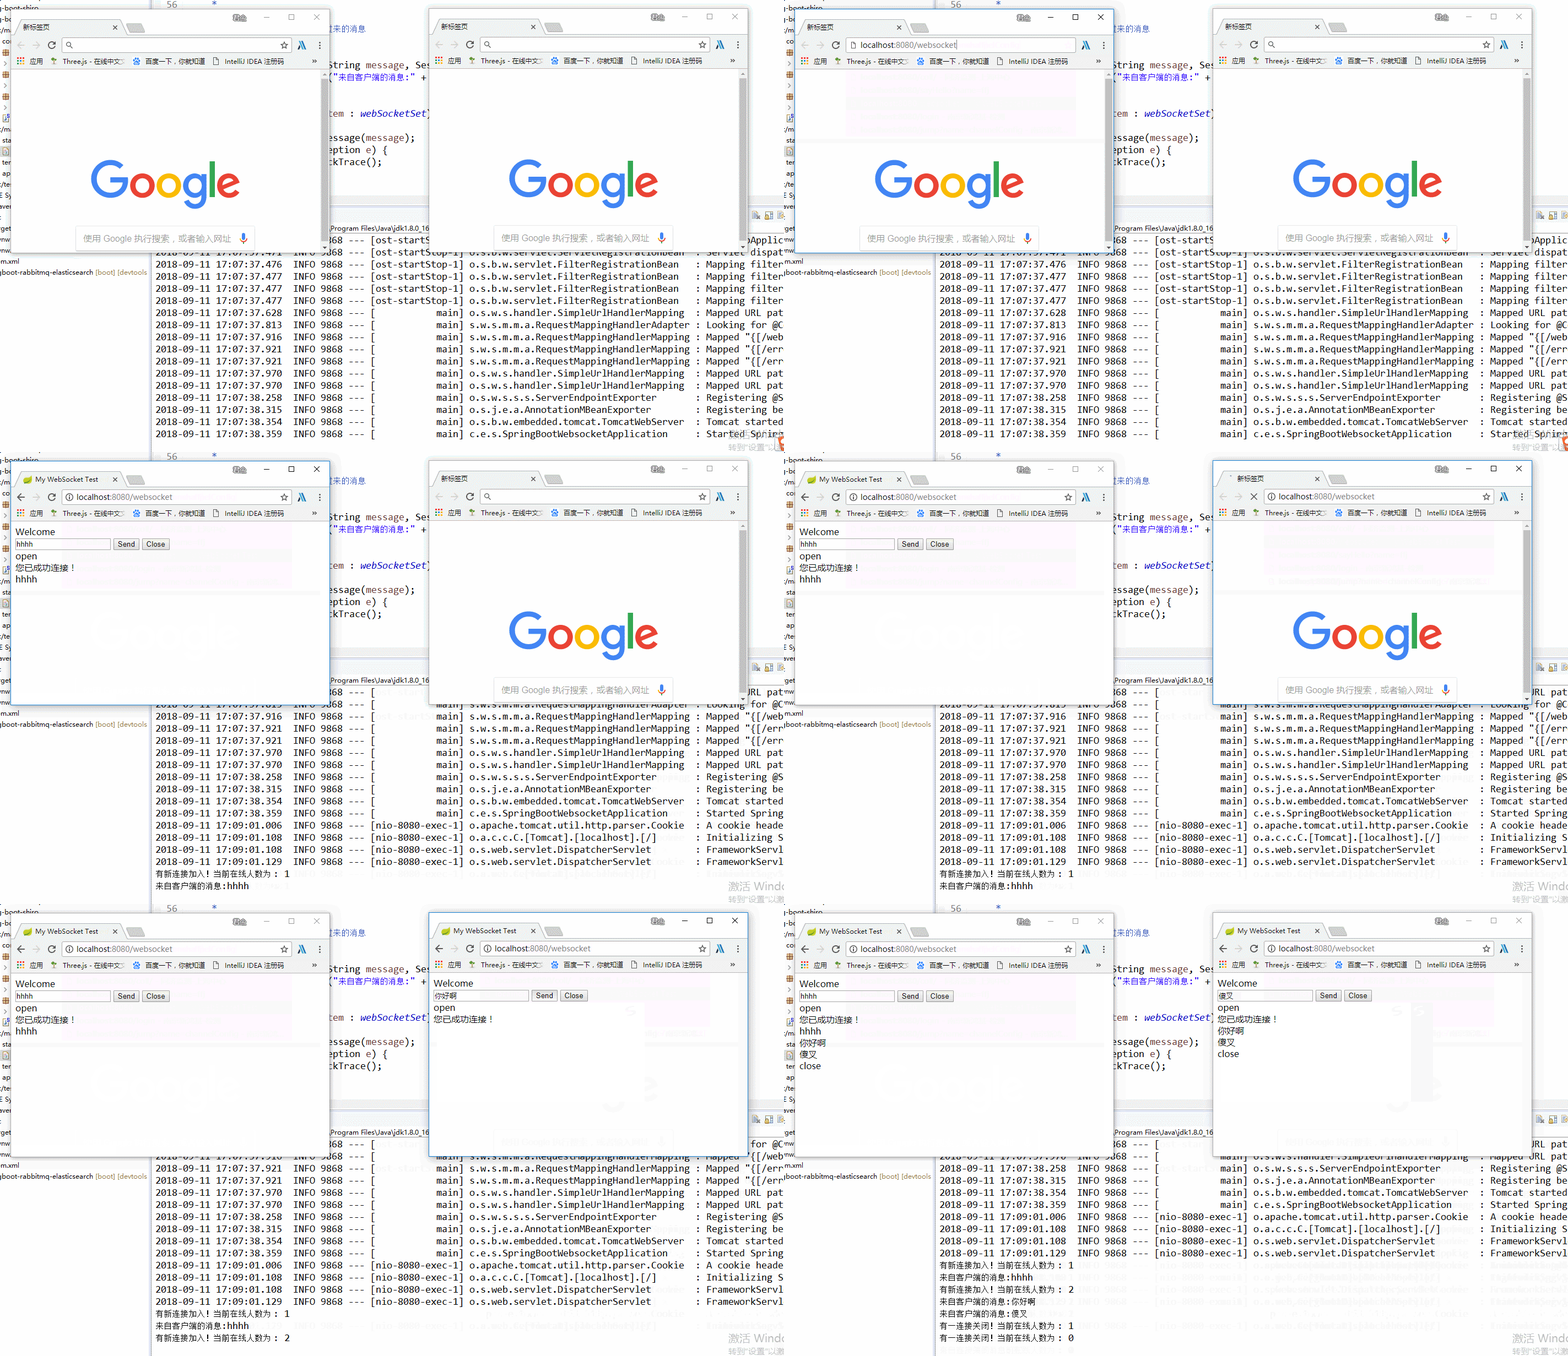
一个很简单的 Demo,可以用 WebSocket 实现简易的聊天室功能
一反常态,我们先来看一下效果,如下:

嫌麻烦的可以直接去我的 GitHub 获取完整无码 Demo。
概述
WebSocket 是一种网络通信协议。RFC6455 定义了它的通信标准。
WebSocket 是 HTML5 开始提供的一种在单个 TCP 连接上进行全双工通讯的协议。
了解计算机网络协议的人,应该都知道:HTTP 协议是一种无状态的、无连接的、单向的应用层协议。它采用了请求/响应模型。通信请求只能由客户端发起,服务端对请求做出应答处理。
这种通信模型有一个弊端:HTTP 协议无法实现服务器主动向客户端发起消息。
这种单向请求的特点,注定了如果服务器有连续的状态变化,客户端要获知就非常麻烦。大多数 Web 应用程序将通过频繁的异步 JavaScript 和 XML(AJAX)请求实现长轮询。轮询的效率低,非常浪费资源(因为必须不停连接,或者 HTTP 连接始终打开)。
Web浏览器和服务器都必须实现 WebSockets 协议来建立和维护连接。由于 WebSockets 连接长期存在,与典型的 HTTP 连接不同,对服务器有重要的影响。
基于多线程或多进程的服务器无法适用于 WebSockets,因为它旨在打开连接,尽可能快地处理请求,然后关闭连接。任何实际的 WebSockets 服务器端实现都需要一个异步服务器。
实现
首先去 start.spring.io 快速下载一个 springboot Demo,记得选中 Websocket 依赖。
然后将项目导入你的 IDE 中。
新建一个 config 类用来注册我们的 websocket bean。
我的是 WebSocketConfig.java :
1
2
3
4
5
6
7
8
9
10
11
12
13
14
| @Configuration
public class WebSocketConfig {
/**
* 自动注册使用了@ServerEndpoint注解声明的Websocket endpoint
*
* @return
*/
@Bean
public ServerEndpointExporter serverEndpointExporter() {
return new ServerEndpointExporter();
}
}
|
该加上的注解别忘了加,项目启动时 springboot 会自动去扫描注解的类。
然后是消息接收处理 websocket 连接、关闭等钩子。
MyWebSocket.java :
1
2
3
4
5
6
7
8
9
10
11
12
13
14
15
16
17
18
19
20
21
22
23
24
25
26
27
28
29
30
31
32
33
34
35
36
37
38
39
40
41
42
43
44
45
46
47
48
49
50
51
52
53
54
55
56
57
58
59
60
61
62
63
64
65
66
67
68
69
70
71
72
73
74
75
76
77
78
79
80
81
82
83
84
85
86
87
88
89
90
91
92
93
94
95
96
97
98
99
| @ServerEndpoint(value = "/websocket")
@Component
public class MyWebSocket {
// 静态变量,用来记录当前在线连接数。应该把它设计成线程安全的。
private static int onlineCount = 0;
// concurrent包的线程安全Set,用来存放每个客户端对应的MyWebSocket对象。
private static CopyOnWriteArraySet<MyWebSocket> webSocketSet = new CopyOnWriteArraySet<MyWebSocket>();
// 与某个客户端的连接会话,需要通过它来给客户端发送数据
private Session session;
/**
* 连接建立成功调用的方法
*/
@OnOpen
public void onOpen(Session session) {
this.session = session;
webSocketSet.add(this); // 加入set中
addOnlineCount(); // 在线数加1
System.out.println("有新连接加入!当前在线人数为 : " + getOnlineCount());
try {
sendMessage("您已成功连接!");
} catch (IOException e) {
System.out.println("IO异常");
}
}
/**
* 连接关闭调用的方法
*/
@OnClose
public void onClose() {
webSocketSet.remove(this); // 从set中删除
subOnlineCount(); // 在线数减1
System.out.println("有一连接关闭!当前在线人数为 : " + getOnlineCount());
}
/**
* 收到客户端消息后调用的方法
*
* @param message
* 客户端发送过来的消息
*/
@OnMessage
public void onMessage(String message, Session session) {
System.out.println("来自客户端的消息:" + message);
// 群发消息
for (MyWebSocket item : webSocketSet) {
try {
item.sendMessage(message);
} catch (IOException e) {
e.printStackTrace();
}
}
}
/**
* 发生错误时调用
*/
@OnError
public void onError(Session session, Throwable error) {
System.out.println("发生错误");
error.printStackTrace();
}
public void sendMessage(String message) throws IOException {
this.session.getBasicRemote().sendText(message);
// this.session.getAsyncRemote().sendText(message);
}
/**
* 群发自定义消息
*/
public static void sendInfo(String message) throws IOException {
for (MyWebSocket item : webSocketSet) {
try {
item.sendMessage(message);
} catch (IOException e) {
continue;
}
}
}
public static synchronized int getOnlineCount() {
return onlineCount;
}
public static synchronized void addOnlineCount() {
MyWebSocket.onlineCount++;
}
public static synchronized void subOnlineCount() {
MyWebSocket.onlineCount--;
}
}
|
关键就是@OnOpen、@OnClose等这几个注解了。每个对象有着各自的 session,其中可以存放个人信息。当收到一个客户端消息时,往所有维护着的对象循环 send 了消息,这就简单实现了聊天室的聊天功能了。
其中 websocket session 发送文本消息有两个方法:getAsyncRemote()和 getBasicRemote()。 getAsyncRemote 是非阻塞式的,getBasicRemote 是阻塞式的。
然后我用了 Controller 来简单跳转测试页面,也可以直接访问页面。
InitController.java :
1
2
3
4
5
6
7
8
9
| @Controller
public class InitController {
@RequestMapping("/websocket")
public String init() {
return "websocket.html";
}
}
|
websocket.html :
1
2
3
4
5
6
7
8
9
10
11
12
13
14
15
16
17
18
19
20
21
22
23
24
25
26
27
28
29
30
31
32
33
34
35
36
37
38
39
40
41
42
43
44
45
46
47
48
49
50
51
52
53
54
55
56
57
58
59
60
61
62
63
64
65
66
67
68
69
70
71
| <!DOCTYPE html>
<html>
<head>
<meta charset="UTF-8">
<title>My WebSocket Test</title>
</head>
<body>
Welcome<br/>
<input id="text" type="text" />
<button onclick="send()">Send</button>
<button onclick="closeWebSocket()">Close</button>
<div id="message">
</div>
</body>
<script type="text/javascript">
var websocket = null;
//判断当前浏览器是否支持WebSocket
if('WebSocket' in window){
websocket = new WebSocket("ws://localhost:8080/websocket");
}
else{
alert('Not support websocket')
}
//连接发生错误的回调方法
websocket.onerror = function(){
setMessageInnerHTML("error");
};
//连接成功建立的回调方法
websocket.onopen = function(event){
setMessageInnerHTML("open");
}
//接收到消息的回调方法
websocket.onmessage = function(event){
setMessageInnerHTML(event.data);
}
//连接关闭的回调方法
websocket.onclose = function(){
setMessageInnerHTML("close");
}
//监听窗口关闭事件,当窗口关闭时,主动去关闭websocket连接,防止连接还没断开就关闭窗口,server端会抛异常。
window.onbeforeunload = function(){
websocket.close();
}
//将消息显示在网页上
function setMessageInnerHTML(innerHTML){
document.getElementById('message').innerHTML += innerHTML + '<br/>';
}
//关闭连接
function closeWebSocket(){
websocket.close();
}
//发送消息
function send(){
var message = document.getElementById('text').value;
websocket.send(message);
}
</script>
</html>
|
要注意,这里没有用到任何模板引擎,所有直接把 websocket.html 放在 static 文件夹下就可以访问了。
所有的这些搞好就可以运行了,一个简单的效果就能出来。
End.
参考
